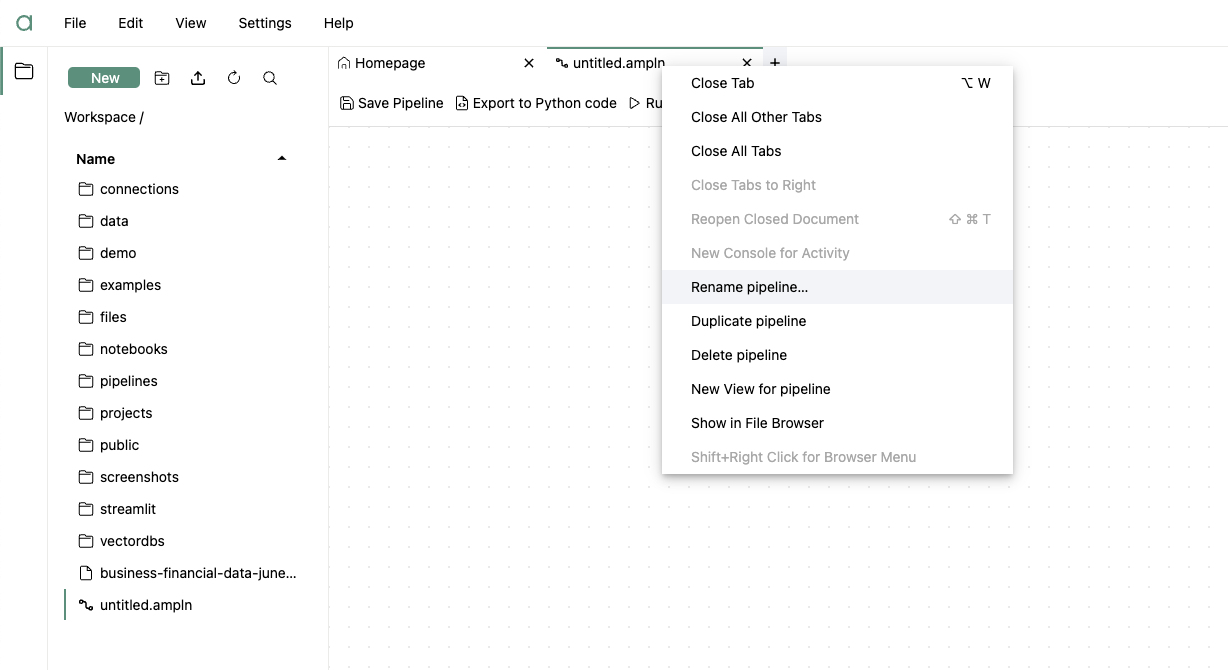
Rename your pipeline
Once you clicked on “New pipeline”, a new file is created and added to your workspace.
A name is automatically associated to the file, but you can rename it, either by right-clicking on it from the file browser or the tab title.
Add an input
- Let’s start by adding an input component.
From the right sidebar, hold click on the CSV File Input component, then drag and drop it onto the canvas.
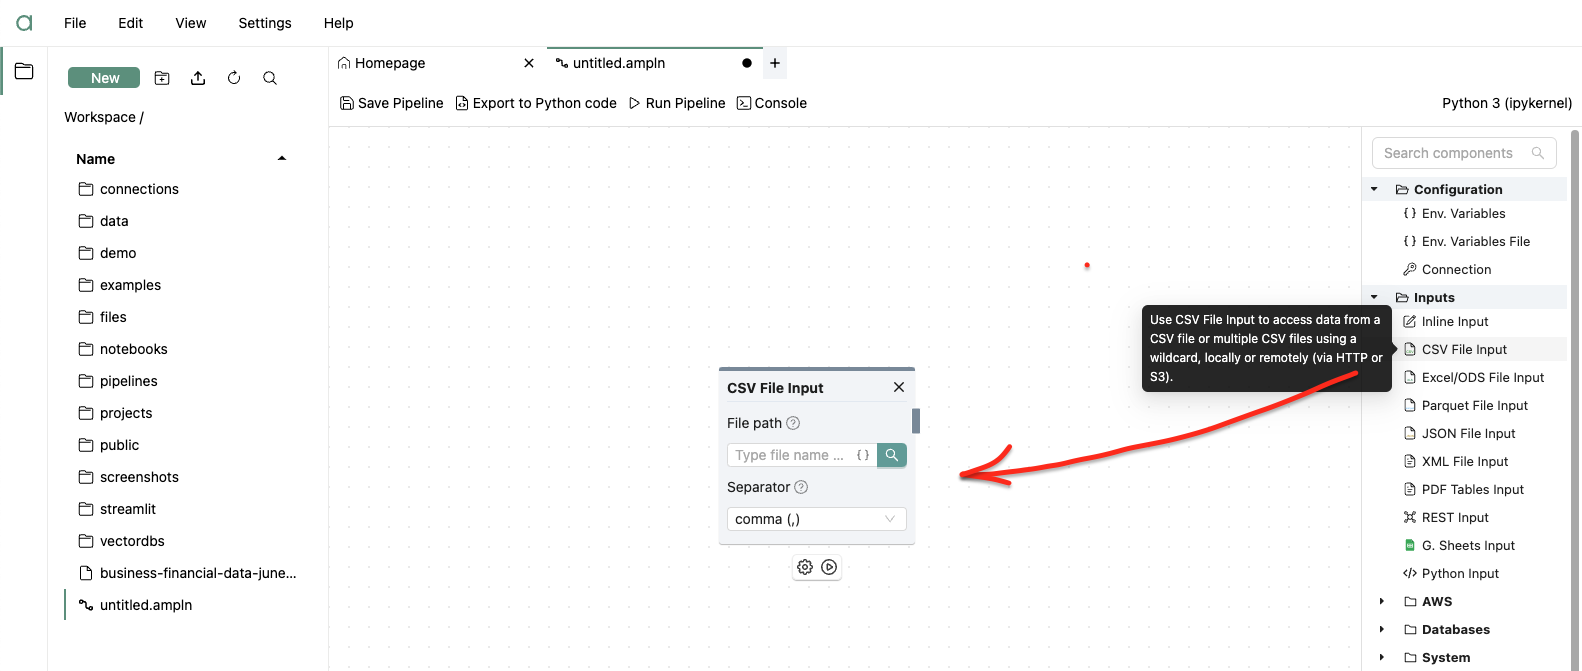
Components on the canvas offer two levels of configuration.
The first level typically includes the essential and most frequently accessed parameters required for operation.
While the second level can be accessed by clicking on the cog icon at the bottom of the component box, and offer advanced configuration.
- Let’s start by specifying a file. You can either type the file path and name or select it by clicking on the search button next to the File Path input field. Alternatively you can specify a URL pointing to a file. You can also drag and drop directly a file directly in this window.
In this example, let’s provide a sample file hosted here:
https://gist.githubusercontent.com/tgourdel/658d6103fbce828d1523fa1e2800a955/raw/b1af734af0a556cac4d2a84a532427eabaa2afb0/gistfile1.txt
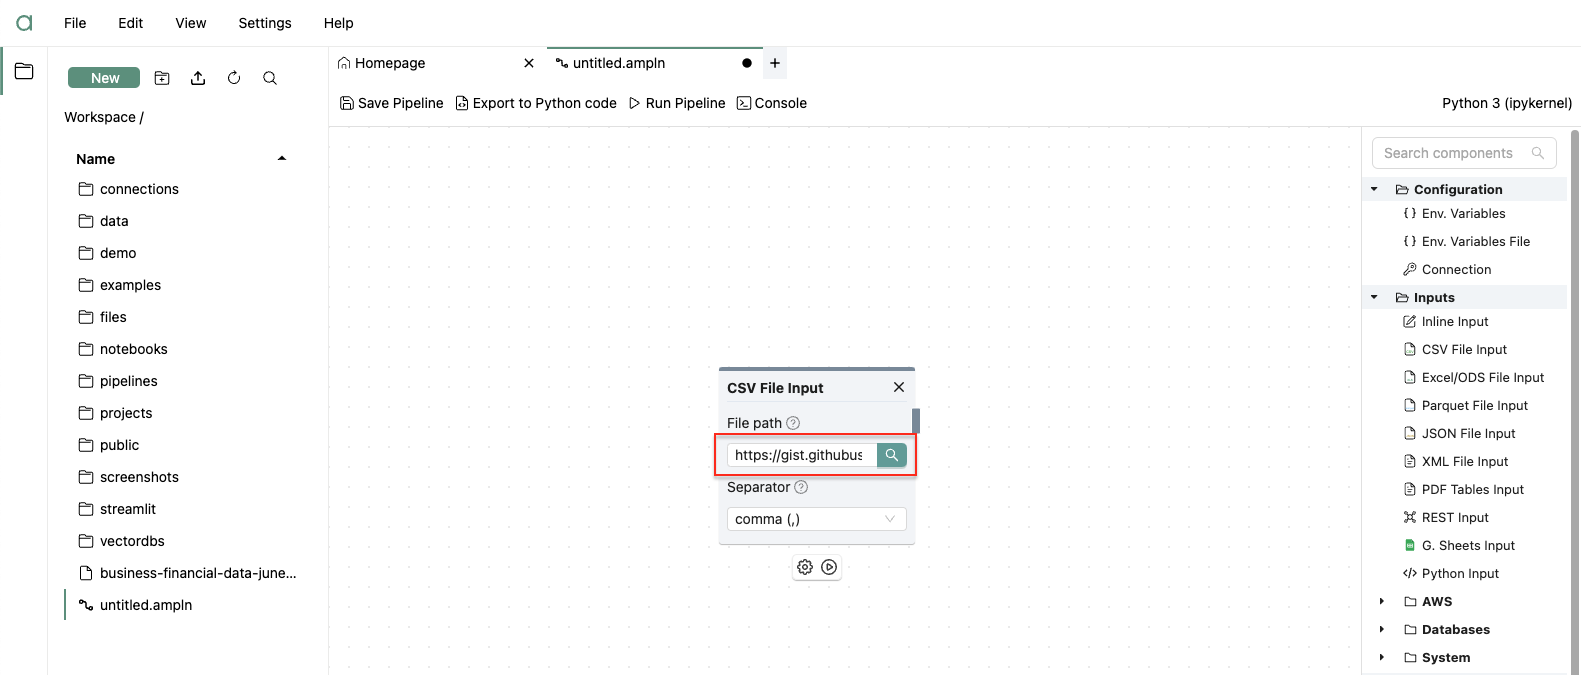
The file separator selected by default is correct. Let’s continue.
To access advanced configuration options, click on the small cog icon located at the bottom
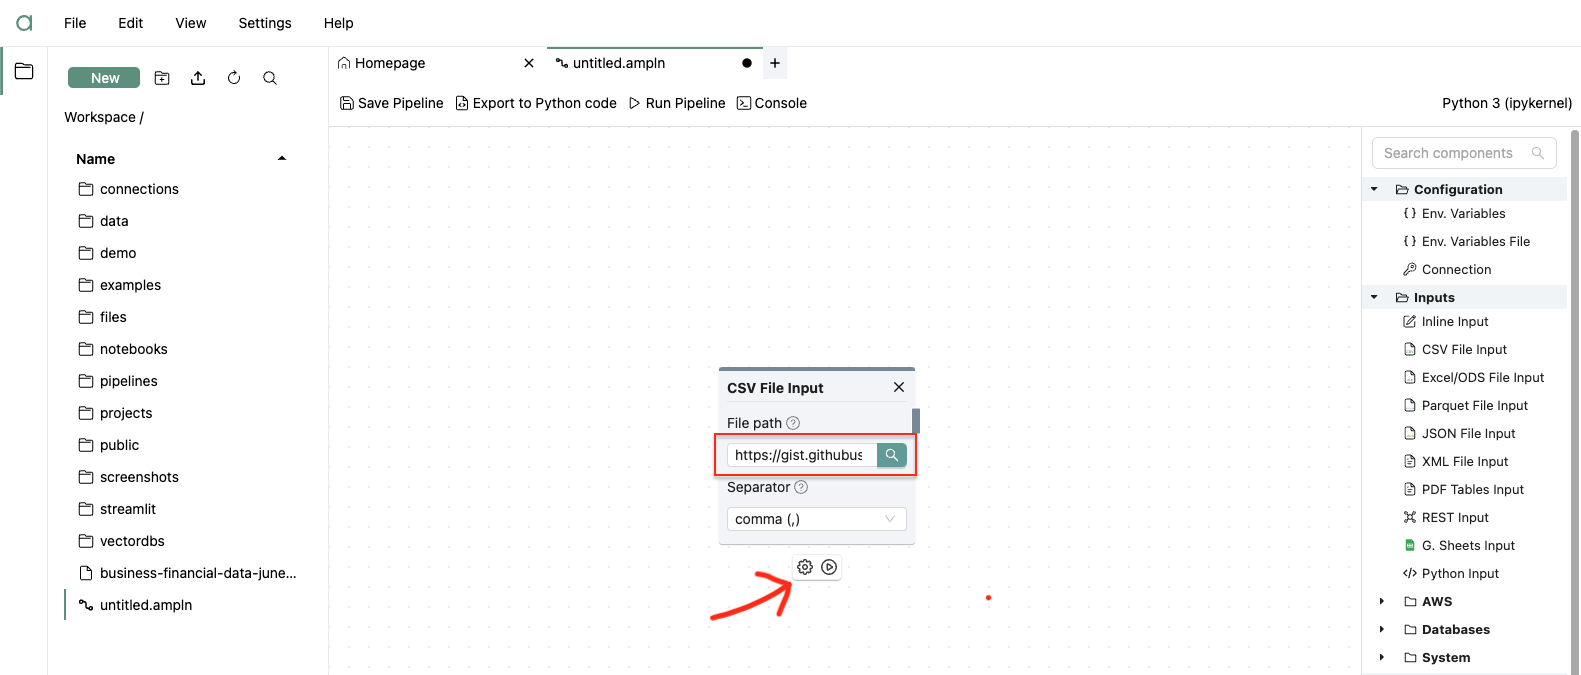
No modification to the advanced parameters are necessary. Now, let’s ensure the component is functioning correctly. Please click on the circled play button located at the bottom of the component.
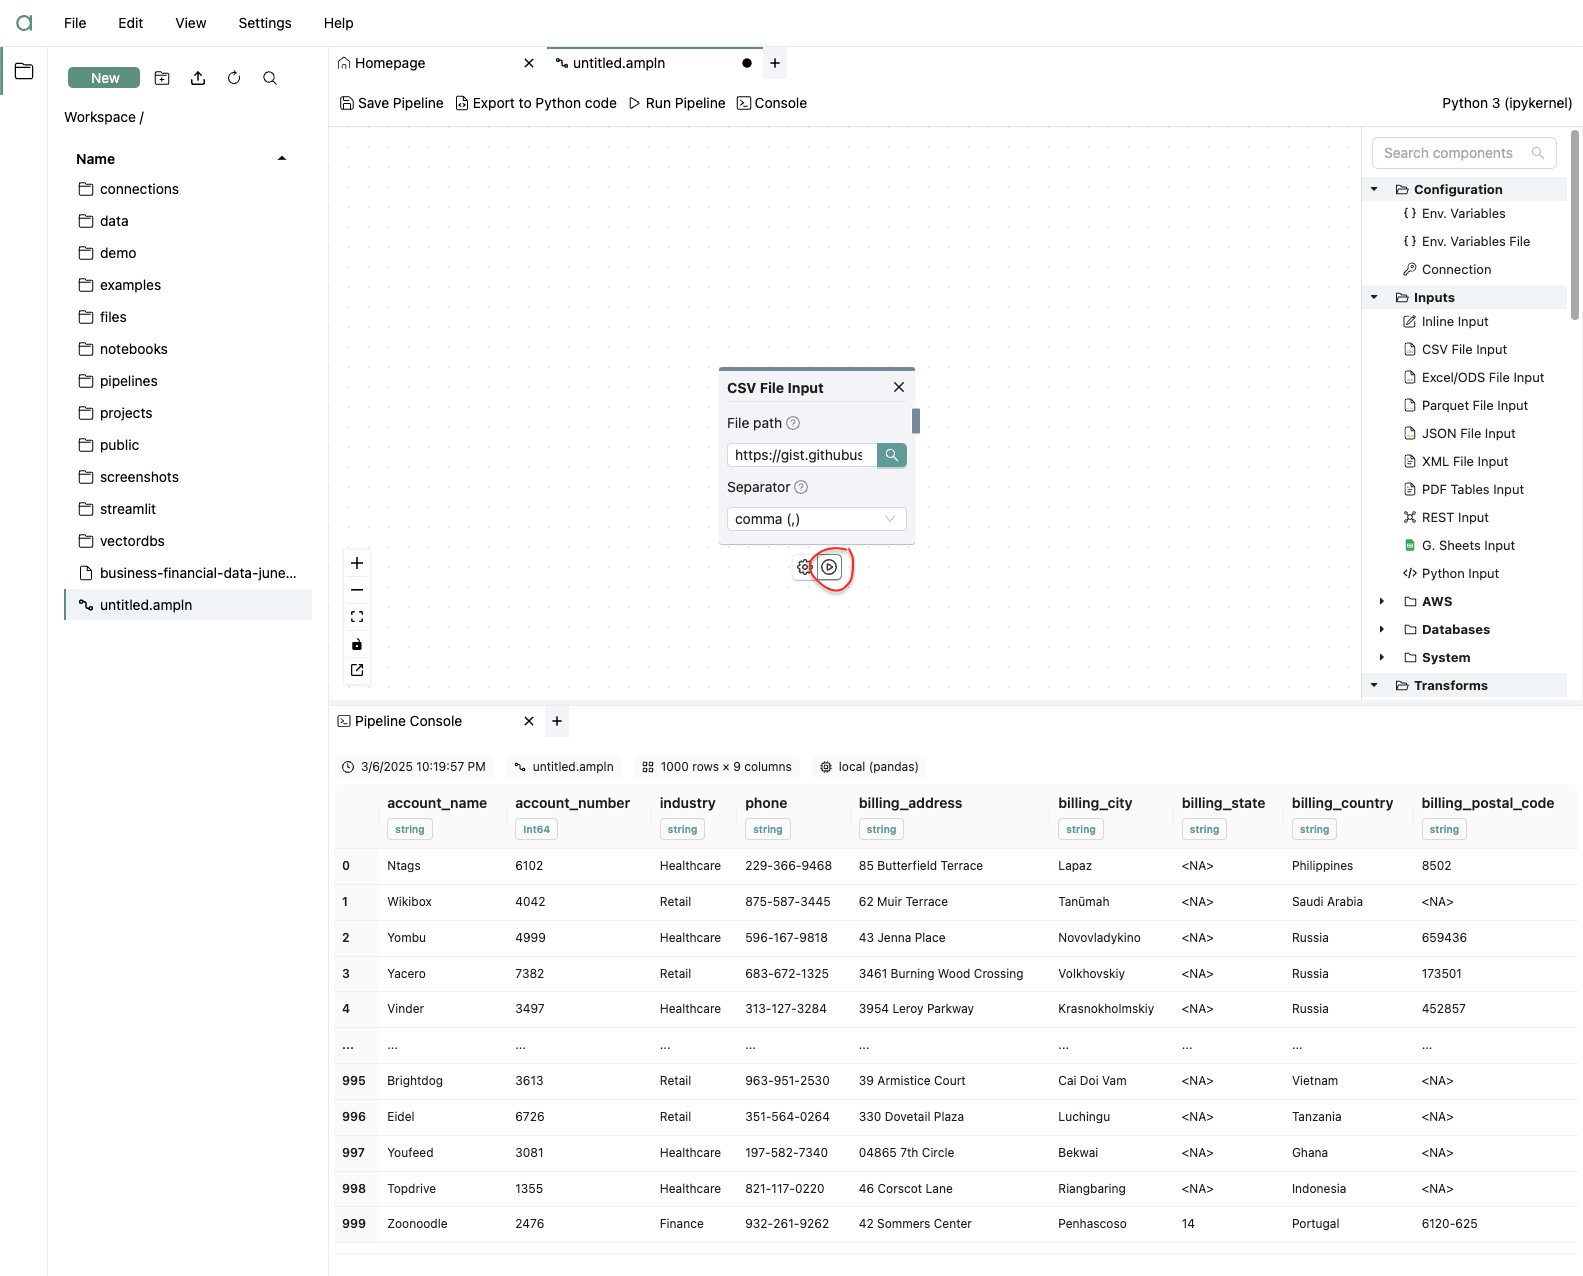
Executing the component opens the Console, which displays critical information from your pipeline’s execution.
Clicking the circled play button provides a data sample if successful, or an error message with troubleshooting information if it failed.
The data sample allows a preview of the data.
In our “accounts.csv” sample, accounts originate from various countries. We aim to filter for accounts from the United States only.
To accomplish this, we will use a transform component.
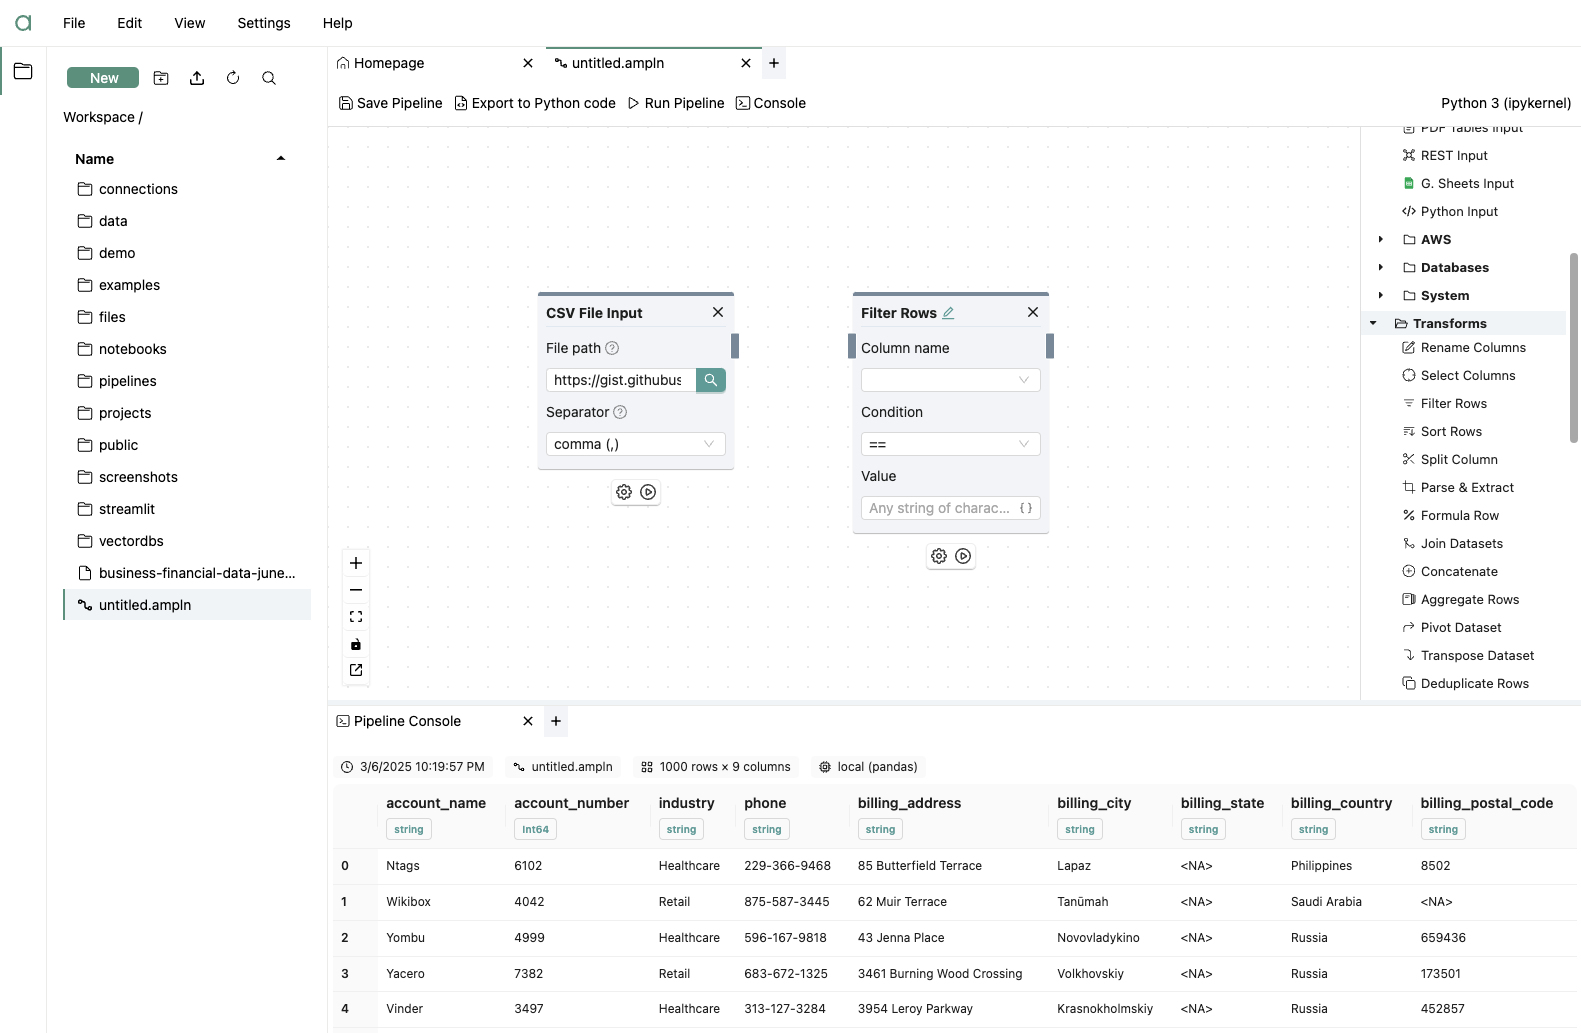
Add a transfrom
In the right sidebar, open up the transform submenu and drag and drop the “Filter” component.
-
First, create a link between the CSV File Input and the Filter by clicking on the right grey handle of the CSV File Input and dragging the link to the left handle of the Filter.
-
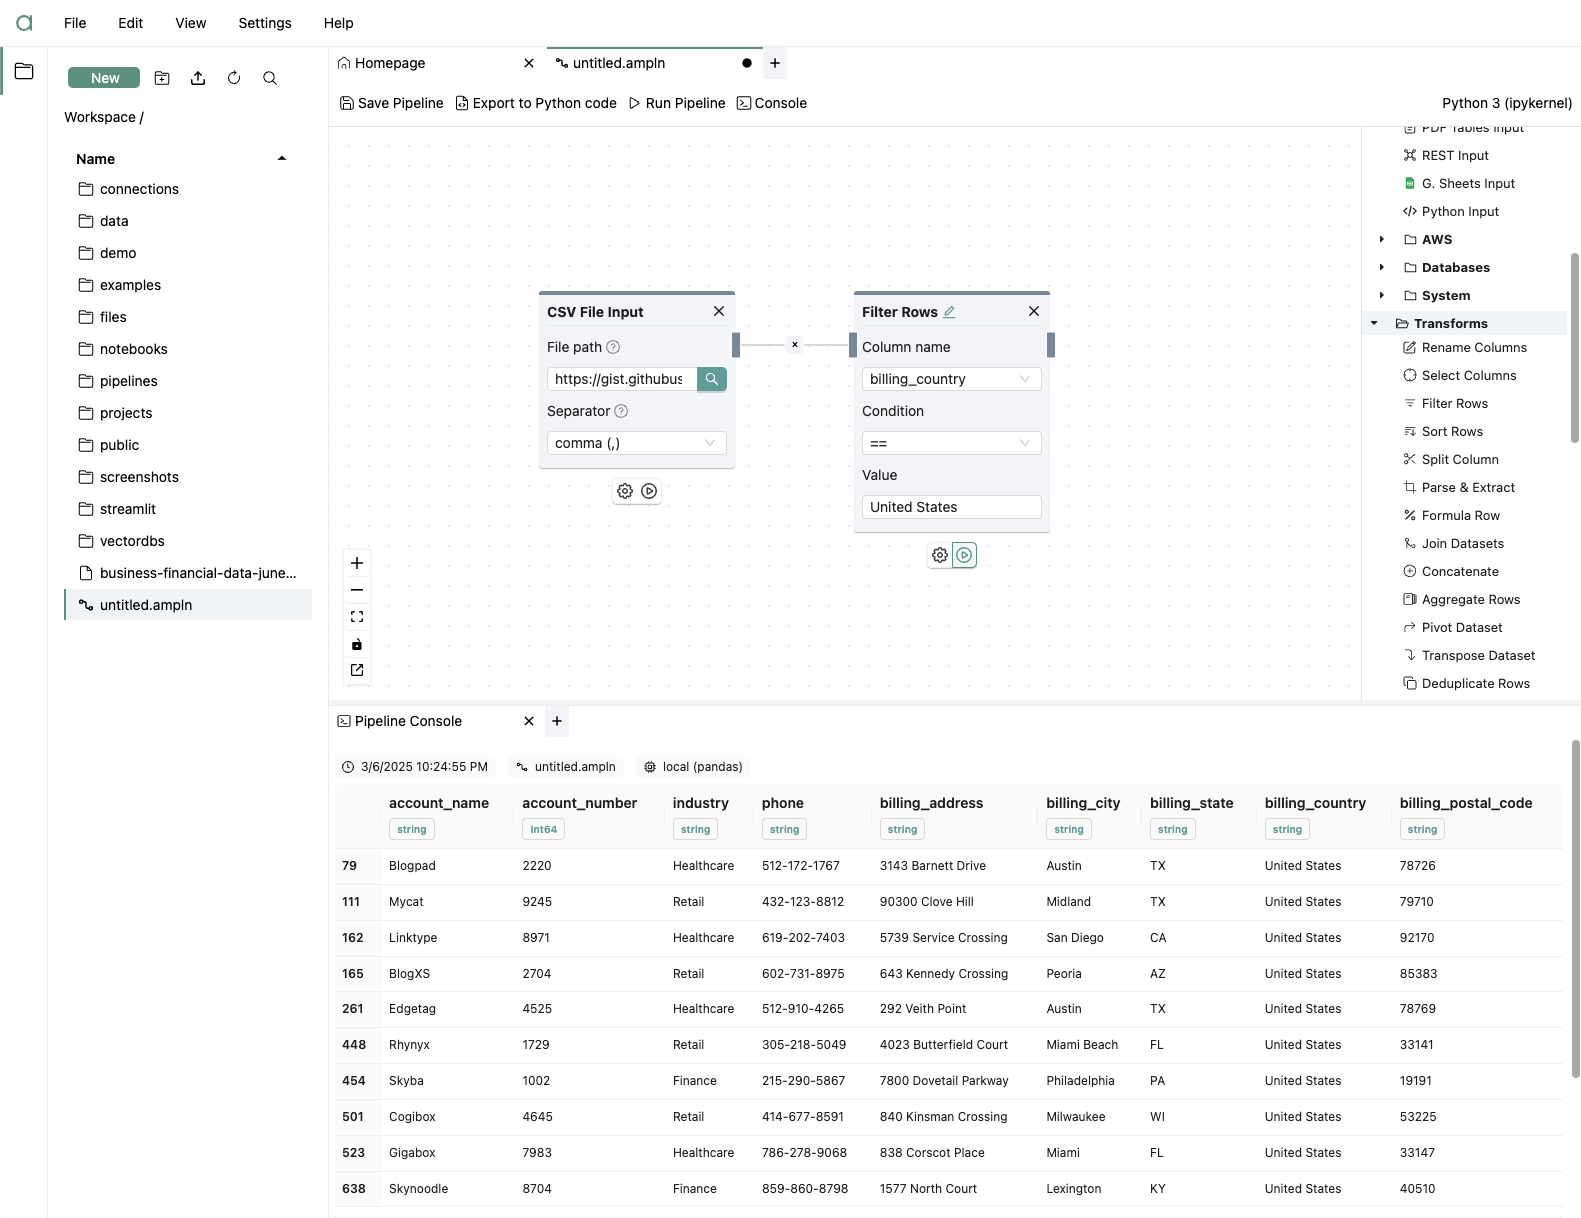
Next, configure the Filter. Open the drop down for selecting a column and click on “Retrieve columns”. Select “billing_country” in the Column name field, or copy and paste it from the Console.
Select the “==” condition. Then, enter “United States” in the value field.
- Click on the circled play button to execute the pipeline up to the filter. You can now view the filtered data in the Console.
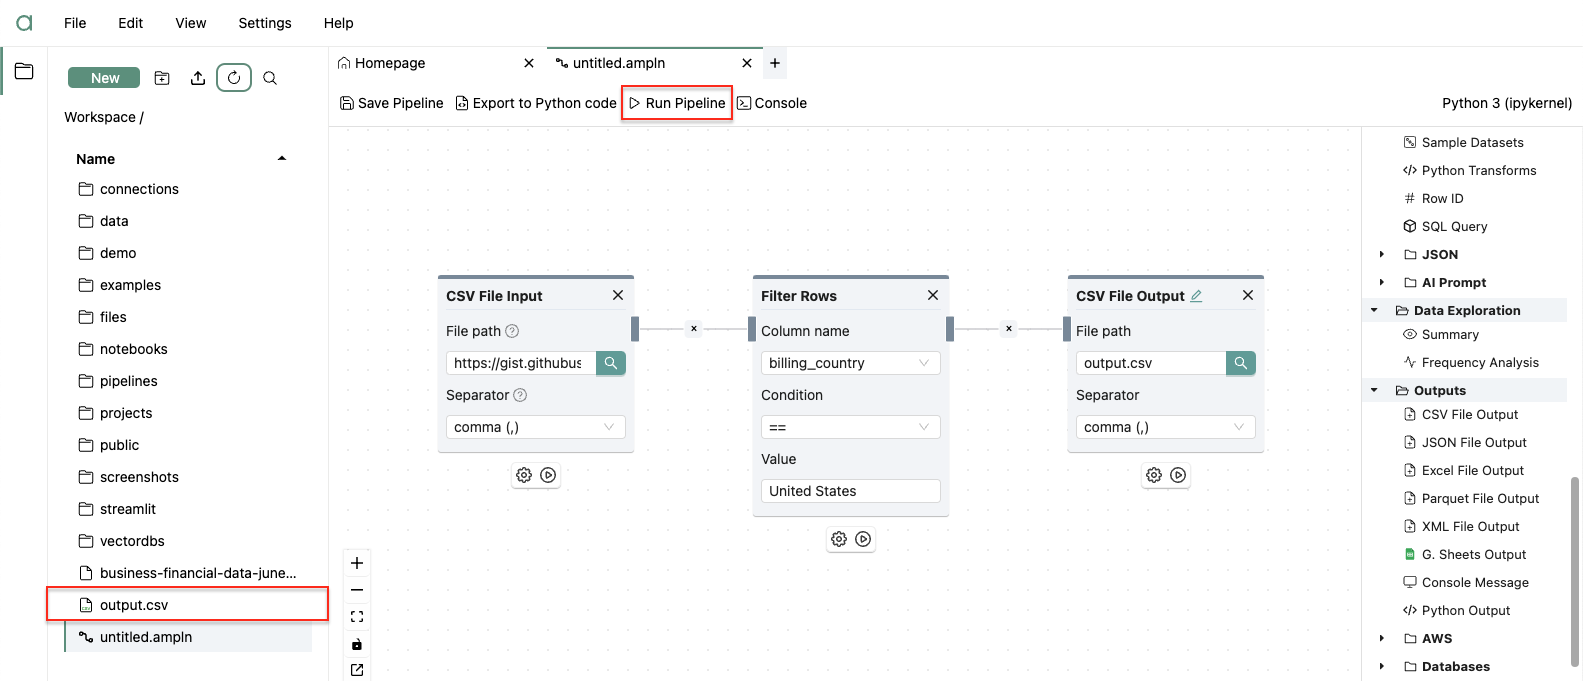
Add an output
Now, let’s output the filtered data into a new CSV file for simplicity.
Drag and drop the CSV File Output onto the canvas and link the Filter and CSV File Output components.
Enter a new filename, like “output.csv,” and leave the remaining configuration unchanged.
Run the pipeline
To run the entire pipeline, click on “Run Pipeline” in the toolbar below the tab title.
Export to Python
Once your pipeline is ready, you can generate Python code to run it in any environment that supports Python. In the pipeline toolbar, click on “Export to Python code”.
This code utilizes common Python libraries, in particular Pandas.